- A+
Introduction
As technology advances, the need for better printing quality and larger paper sizes becomes more and more prevalent. This is where A3 printers come in handy. However, to get the best out of these printers, it is essential to install the right drivers. In this article, we will guide you through the process of downloading and installing the A3 printer driver.
Step 1: Identify Your Printer Model
Before you download any driver, it is vital to know the exact model of your A3 printer. This information can be found on the printer itself or in the user manual that comes with it. Once you have the model number, you can search for the driver on the manufacturer's website.
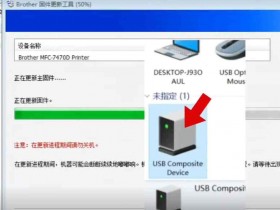
Step 2: Download the Driver
After identifying your printer model, go to the manufacturer's website, and search for the driver download page. Look for the driver specific to your operating system, whether it be Windows, Mac, or Linux. Download the driver and save it on your computer.
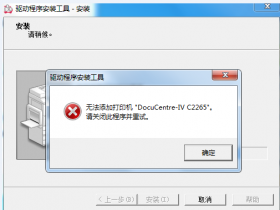
Step 3: Install the Driver
With the driver downloaded, it is time to install it. This process will vary depending on your operating system. For Windows, double-click on the downloaded driver file, and follow the instructions in the installation wizard. For Mac, double-click on the driver file to start the installation process. For Linux, open up a terminal window and enter the command to start the installation process.
Step 4: Test the Printer
After installing the driver, it is always a good idea to test the printer to ensure that it is functioning correctly. You can do this by printing a test page or any document of your choice.
Conclusion
Installing the right driver is crucial in getting the best out of your A3 printer. With the steps outlined in this guide, you can now confidently download and install the driver for your printer, regardless of your operating system. Happy printing!